
Windows 10 — the next generation of OS technology for your PC.
Exciting right? Only if you install it correctly.
If something goes wrong….
…you may find the latest technology crippling.
Computers is complex and this means that everything needs to be done in a systematic manner — sorry no magic here.
And that’s why, I will go through a guide on “How to prepare your PC for Windows 10“.
We will discuss two scenarios that users generally go through.
First one is Windows 10 upgrade and other one is Windows 10 fresh installation.
There has been confirmation that Windows 10 will first upgrade and then only you will be able to install the Windows 10 fresh installation.[More on this later]
Confused whether you should upgrade to Windows 10 or not? Read What You Should Keep In Mind Before Upgrading to Windows 10
How to prepare your PC for Windows 10
0. Check Whether Your PC is ready for Windows 10
The first step before upgrading is to be extra sure that your PC supports Windows 10. There are many ways you can check the requirement.
Check using the Microsoft Specification page
Microsoft has released official system requirement for Windows 10.
This means that you can match your system specs with the specification and then go to upgrade your Windows.
The system requirements page for Windows 10 offers enough information for you to know whether your system will be able to handle Windows 10 or not.
The official requirements are as follows:
- Use latest OS: Windows 7 SP1 or Windows 8.1
- 1 GHz Processor or faster processor
- 1 GB of RAM(32-bit) and 2 GB of RAM(64-bit)
- 16GB/32GB for 32-bit and 64-bit OS
- A graphics card that can handle directX 9 or above with WDDM 1.0 driver
- A display of minimum 1024 x 600
Basically, if you are running Windows 7 SP1 or Windows 8.1, you will be able to upgrade your Windows without any difficulty.
Using Windows Automated Tool To Find Out The Truth
If you are reading this, you would have probably got an upgrade icon in your taskbar(bottom right). It is four square white boxes that appeared for many users who qualify for the free Windows upgrade.
![]()
This notification based simple app can also help you to check whether your PC will be able to get an upgrade or not.
Let’s go through the steps.
1. Click on the square white box Windows icon.

2. Next, you need to click on the menu icon on top left. Once opened, it will showcase some options you can check.
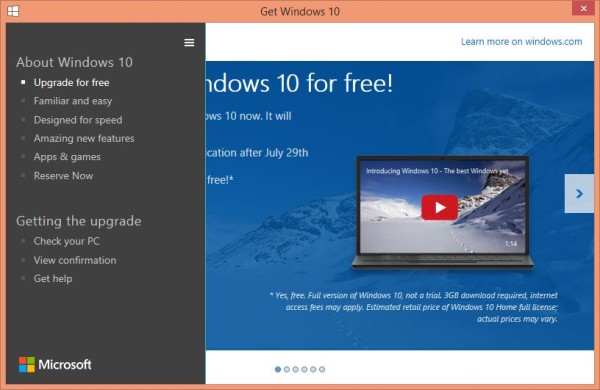
3. The 2nd half of the menu(Getting the update) consists of three options. The first option “Check your PC” will do the trick.
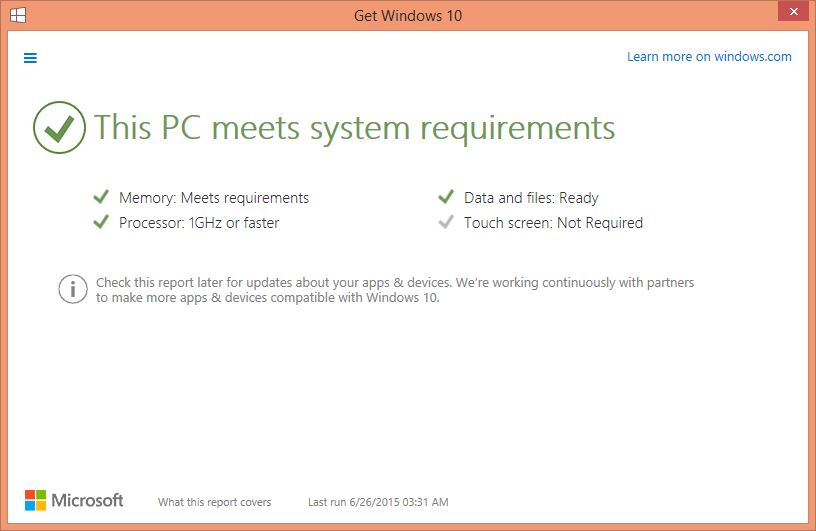
If you see all the green check mark sign, you are ready to get started with the Windows 10.
Congratulations! Enjoy Windows 10.
What if I do not have a Windows 10 upgrade notification or app?
Many users might not see the Windows 10 upgrade notification or the app. What’s going on there?
According to Microsoft, there can be many reasons behind you are not getting the upgrade notification.
I have two machines in my house, one is desktop and other is the Dell laptop. Both of them are using the genuine Windows 8.1.
But to my surprise, only my desktop got the upgrade notification(at the time of writing this guide).
Reasons? There can be many.
If you are not able to see any notification, there can be any of the following reasons mentioned below:
- You are not running Windows 7 SP1 or Windows 8.1.
- The update KB3035583 is applied to your PC. This update is responsible for the app to appear.
- There can be some problems with update KB3035583 and you might want to do a manual removal and install it again.
- You are not using a genuine version of Windows.
- The PC doesn’t meet the requirement of Windows 10.
1. Deciding between a clean install vs. an Upgrade
To make a smooth transition from previous Windows version to the latest one is to decide clearly on how you are going to approach the transition.
To make sure that you are doing it right, you have to keep few questions answered early. They are as follows:
- Is your current Windows installation free from bugs?
- Are you focused on backing up your data?
- What operating system you are using and what is the version of the Windows?
This few questions can really answer your dilemma of a clean install vs. an upgrade.
Windows Free from bugs: Not everyone Windows is stable.
It can be plagued with bugs, unstable patches, errors and much more.
Upgrading your PC in this state means carrying all the errors and bugs into the latest version of your Windows — in this case — Windows 10.
If your Windows is not free from bugs or errors, it is always a good idea to do a clean install vs. an upgrade.
Current Windows Version: I know this can sound insignificant to many of the users, but the truth is that you need to investigate which Windows you are using.
The current upgrade is only scheduled for Windows 7 and Windows 8.1.
Clearly, if you are using a Windows XP or Windows Vista(seriously?), you cannot upgrade your current Windows.
The main focus here is to provide the upgrade option to the latest Windows versions and not the old one.
If your Windows is not Windows 7 or Windows 8.1, you need to do a clean installation compared to an upgrade.
Backing Up Data: Backing up data is necessary if you are doing a clean installation.
This step might be easy and automated using software, but it takes a lot of time to back up your data. For example, freelancers(like me) or office workers cannot engage in such a time-consuming act.
We need to get the upgrade done as soon as possible and get to the working routine(Well, time is money for working professionals).
In short, if you are not planning to backup data, it is better to do an upgrade than a clean insallation.
2. Steps to Follow If You Are Upgrading
If you do not follow any steps during an upgrade, the installation can go wrong. It is always good to give Windows 10 its best environment before the upgrade takes place.
Below are some of the key points that you need to take note before making the real update happen.
- Make Sure Your Windows is Updated: If you are not the guy that does automatic updates, this is the time to update your Windows with every security patches and other important updates for your system.
- Clean up temporary files: Windows upgrade can require the temporary files space. Also, keeping the temporary files away will enable faster upgrade with better stability.
- Update all drivers: This can seem quite counter-intuitive, but updating all the drivers can work wonders for your new installation. The new drivers might work with the latest Windows, saving you tons of time to do other things.
- Do Disk Defragmentation: Disk Defragmentation is necessary to keep up your installation as smooth as possible. You can defrag using the inbuilt Windows 7 or Windows 8.1 defrag tool or you can use a 3rd party defrag tool for better and faster defragmentation.
- Remove Unnecessary Peripherals: It is always a good idea to remove all those unnecessary peripherals for a smooth upgrade to Windows 10.
Great, you are all set for the upgrade of your Life!(Kidding). To keep things simple, the above steps will keep a minimal load on the upgrade and make it a sure success.
But, not everything is in our hands right? Sometimes things go wrong and the upgrade may fail.
Don’t lose hope as you still have the option to do a manual clean install and that’s why we will next go for a clean manual install guidelines.
3. Steps to Follow If You’re doing a clean install
Clean Install… they are awesome.
They are clean and do not carry any backward bug or error with them. Doing a clean install means walking a different path.
Take care of all the following things before you do a clean install of Windows 10.
Hunt for Drivers and Installation Files: The first crucial step is to hunt for the drivers for hardware and also look for installation files for your important software.
Copy down all the important serial key with yourself: Writing down all the serial key for the software is necessary for making them work in Windows 10. Make sure you copy everything onto a paper or into your email draft.
4. Backing Up All the Important Data
Doing a clean install?
or an Upgrade?
Doesn’t matter. As in both the cases, you need to backup your data.
Backing up data is an easy process and you can do it with the help of tools or software.
There can be many ways to backup all your data.
The first way is to create a system backup image or clone hdd to ssd that you really need.
The backed up image can be stored into another drive or you can use free cloud services for much better backup.
The backup can be used if something goes wrong. The installation can fail and then you easily restore the backup images to start your work.
You can also choose to backup only certain folders, such as documents and desktop.
Wrap Up
Upgrading anything requires attention and clear planning. And, that’s why I came up with the idea to publish the article.
If you think, you need more clarification regarding Windows 10 installation or upgrade, don’t forget to use the comment section.
I am also waiting patiently for the Windows 10 to upgrade and will review it as soon as it comes out.
Until then, keep visiting TA.


